Monday 24 September 2012

So Audrey...


This was my first photoshoot without my house photographer! So I had little direction, which was nice. These photos are courtesy of my good friend Natalie, more of her work here: http://nataliefairs.blogspot.co.uk/

The shoot is based on 'Breakfast at Tiffany's', I know I'm typically a 50s girl but who can resist such a decade. Especially after looking into the Beatnik era. It's such a great film and there are so many things we can all learn from the wonder that is Audrey Hepburn.

Now, controversially in my opinion, skinny is the new beautiful. However back in the 50s and 60s, skinny was scrawny, and curves were where it was at! Of course I condone this, I like cakes too much not to. Audrey, on the other hand had the thinner, boyish shape that stralets weren't supposed to have. Yet she oozed appeal. She truly dressed for her body shape, making her one of my absolute idols, showing that you really do have to know your body and love it!

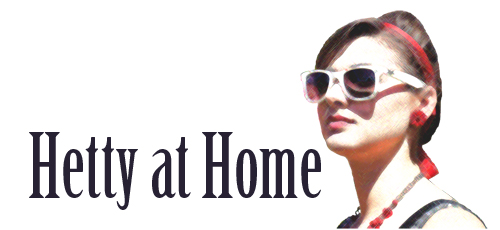
I know the outfit isn't completely obvious here but let me tell you what it consists of:

- Dress: Dorothy Perkins
It's knee length and perfect for this look as the high neck line gives the impression of Holly Golightly's jewellery without losing the elegance of ones neck. Yet the lace shows off your collar bone.

-Shoes: New Look
Yes, these aren't so Holly but they do add a new age twist that I'm not going to apologise for.

Cigarette Holder
I don't smoke, so the cigarette holder isn't quite as elegant as the one I would like, but it was so necessary as one of my favourite scenes is at her party where she sets fire to someone's hair. 


Sunday 9 September 2012

No Good Beatnik

In this post I tried to emulate the Beatnik style of the late 1950s/ early 1960s


 Audrey Hepburn

Classic Beatnik look.

I teamed a beret with leggings and a long sleeved black jumper to create a slinky dark silhouette, with a cinch belt to tidy up the join. Pumps and glasses are the perfect accessories for this look. 


It's been a while since I've been able to do a blog post because I've been quite ill recently, as well as this, I left my camera at a friends house. So I am sorry about the quality of the photos, I shall endeavour to carry on without the camera though ♥

Tuesday 21 August 2012

Strawberry Daiquiri Cuptails

I decided I wanted to give cuptails a go, however I didn't want to do just an alcoholic flavoured cupcake, I wanted to go all out and after searching the internet I found this idea, where you put alcoholic jelly in the middle.


To start, prepare some vanilla cupcakes as you normally would. I use a basic all in one recipe.
 Then use a fruit corer to take out the centre when they are cool. Make sure you don't hit the bottom of the cupcake, only go half way down.  Once you've done this, put them in the fridge so they become cold.


Whilst they're in the fridge, prepare your jelly. I used 'weight watchers' strawberry jelly, as it's suitable for vegetarians. As this was for a strawberry daiquiri cuptail, I also squeezed half a lime in with it.
 Then top up with white rum. This jelly called for 400ml of boiling water, so I used 300ml and then topped it up to 400ml with white rum.
 Once the jelly has cooled for a couple of minutes but is still liquid, take your cupcakes out of the fridge and pour the jelly into the centres. Once this is done, you can return them to the fridge to set.
 After the jelly has set you can start thinking about decoration. I decided to use butter cream.
 To give the butter cream a strawberry flavouring I added strawberry jam to the mixture. If you are not satisfied by the colour of your icing then you can add some red food colouring.

I used a piping bag to ice the cupcakes and then sprinkled lime zest over the top.

I was a tad suspect on how they would taste but I promise you, they are delicious!


This is where I got the idea from.


Sunday 19 August 2012

Fire Fly Jars

Another one from 31 DIY Projects

Here are the ingrediants, if you will.

You need some jars, some glow sticks and glitter. The larger the glitter flakes the better.


 One of my jars had a design on the lid so I painted over it using acrylic.

 Cut open the glow sticks and let the fluid out into the jar, try to make sure it's mainly splattered around the edges and not just at the bottom.


Then sprinkle the glitter in and shake the jar.

Even after doing this I was a tad dubious as they aren't effective in daylight whatsoever.

Saying this when I got them in the dark I was very satisfied. I think they're so cute and would be perfect to add an ambiance to any evening.


Thursday 16 August 2012

Customise your own tea cup

31 easy DIY projects - This is where I got today's ideas from. 


 You need a Sharpie and a Mug.
 Draw/Write on the mug with your Sharpie. I chose a quote from Marilyn Monroe
"It's all a dream, isn't it?"

You can draw it on in pencil first if you want to.
 Then put it in the oven at 200c for 30mins.


If you're struggling with what to put on your mug, here's some other quotes I found:


“All little girls should be told they are pretty, even if they aren't.” - Marilyn Monroe

“We are all of us stars, and we deserve to twinkle.” - Marilyn Monroe

“Imagination is the highest kite one can fly” – Lauren Bacall


What would you put on yours?


Wednesday 15 August 2012

Fascinator

My last blog post featured a fascinator that I had customised in my own 'Gok Wan' style. So I thought I'd show you how I did it.


First of all I raided my craft box and found some bits and bobs including material, feathers and I also managed to find an odd earring and some the were on sale. Even though it's apparently summer, I went for an autumnal theme. I did this because I love the colours of autumn and I believe it reflects the weather at the moment!


 I found this headband in "Claire's Accessories" on a shopping trip. On it's own I don;t feel like it's enough but I love the deep red and thought it would make a great base for this creation.

 1) To begin with I placed the feathers as desired and stitched them to the head band.
 2) To add another dimension I used some material.
 3) I then pleated the material into a fan shape.
 4) Removing the earring hook from the odd earring I used that to cover all the loose ends and to make it look more finished.
 5) I then stitched this into place. If you don't want to stitch the items, feel free to use a glue gun, this will make it more permanent.


Tuesday 14 August 2012

Office Gal


So I put this outfit together, which is my take on the working woman. The basis for this look is a high waisted pencil skirt and a tucked in blouse, if you work off this then you'll be doing fine!

I really love this look, I was so tempted to draw pencil lines down my legs. I used the brown tint within the grey skirt to match the autumnal accessories, of which pearls were also essential.

I partly took inspiration for this look from, Joan, a character from Mad Men, a TV drama based on Advertising in the late 60s. I care more about the clothes than the story line, but it has it's merits.

In this shoot I used a headdress that I had designed and customised myself. Details of this will feature in an upcoming blog.